Friday, December 11, 2009

My New Situation


So here's why I haven't been posting latley- I now live in a tent with no electricity, phone service, internet, or running water!


Me and my husband recently bought ten acres in a pretty undeveloped off-the-grid area here in Northern Arizona and we're living on it, planning a house that we will start putting up in the spring.


We set up a wall tent, which is a big canvas tent with walls- big enough to stand up in (14 x 16 feet in area), put our bed and couch and a woodstove in it, and set up a smaller tent to act as a kitchen.


We have a lantern for light at night, but Craig is building some solar panels and putting together a whole electric setup for us, so soon we will have lights in the tent. And once we have electricity, we can get phone and internet service. For now though, it's kind of nice not having those connections. Once I leave town for the day and get home, I can abandon all thoughts and things connected with the outside world and just relax. Let it all go.
I've done a lot of knitting. I'm knitting Christmas presents for everyone, so I'll start a nice fire, put on some hot water for tea, and sit in the tent and knit.
Someday, I'll have my sewing machine hooked up to our solar grid and all my power usage will be from renewable energy! But for now, my machine is at my parents house and I have to go over there to sew. They were kind enough to let me invade a whole room with my craftiness. My "productive mess" as my mom has always called it. For now though, I'll just be doing a lot of knitting.


Saturday, August 15, 2009

Rainbow Review I

You may or may not know, but I love rainbows. The way all the colors blend together to create a perfect palate is so attractive to me and I love the completeness and playfulness of the ROYGBIV variegation. It makes me feel good just looking at it. I found quite a few items featuring rainbow colors that I liked, so this is probably one of a few rainbow reviews that I will feature. Here are some of my favorites!
I used to have dreadlocks and I had so much fun putting shells, beads, wraps, and decorations in my hair. It was another place to wear jewelery! This Over the Rainbow Dreadlock Sleeve by Knottysleeves reminds me of one I used to have.


I've been seeing a lot of recycled books and book pages lately, and I think it's a creative way to reuse paper that already has something printed on it. These Rainbow Note Cards that Sensitiveartist has redesigned are so cute!! I would love to receive one of these in the mail.

Wonderful craftsmanship by DosPalomas in making this Unicorns and Rainbows Scarf. Handwoven and beautiful, it will pretty much match with anything!


Since I cut my dreads, I've grown my hair long, and one of my favorite ways to wear it is wrapped up in a messy bun and secured with a hair stick. I like how it's such an easy-to-fix style, and it always looks cute. Needless to say, I fell in love with these right away. Stix O SWANKy Pride by Solidswank. These are great!!

Like secret hiding places? You might like this Rainbow Pocket Vase by MintyFreshFusions. It's a cute pendant, and it's got a little pocket at the top for little things: secret notes, flowers, dollar bills...snacks? Whatever you can fit that you don't want anyone else to see.


Now rainbows are all good and fine, but when you put rainbows and mushrooms together, what do you get? Awesomeness. Skatterbrains' playful Rainbow Mushroom Cameo necklace is nothing but awesomeness. It reminds me of being a little girl, but it is something I would still wear. Rainbow mushrooms!


Kudos to all these artists, and I must say, each one had excellent photography. Good job!

Monday, August 10, 2009

Unique and Really Cool Crochet

I crochet a little bit. I think it's a wonderful art! It's beautiful, but add that to the fact that it's functional, and you've got me hooked (haha- hooked. Get it? Sorry...) My problem is, beyond potholders, beanies, and scarves, what else do you do with crochet? Well, here's some people that have gotten creative and made some really awesome items.

This is a wonderful idea! A can cozy by BluePlanetCreations. It looks so comfy, like it would feel really good in my hands. I bet that can o soda is really comfy too. That's why they call it a cozy...

How about this Barbarian/Viking Beanie by candypopcreations? Not your average beanie, folks. I am half Norwegian, so this really appealed to my Norse side. I should wear it while I'm rowing boats down the Colorado River. I love the studs that accent the brim!


Here's to kreations' Saponificozy! Useful and cool! You put the soap into the soap sock and use it like a washcloth. Even better- it helps save those last little slivers of soap from going to waste- stick them in there too instead of leaving them to clog up your drain :)


I am a big fan of cloth diapers. No, I don't have kids, so I have never actually had to wash a dirty cloth diaper myself, and I know that disposable diapers are probably wonderfully convenient, but they are so wasteful! And what are they made out of, anyway? Strange synthetics. But take a look at this 100% wool Diaper Cover by naturegalsmom: it's natural, it's gorgeous, and it's reusable. She's got all kinds of colors, for every occasion!

I think this afghan by JillianEngelhardt is a beautiful piece of work. Look at those colors! Also, it's big enough for a twin bed. It seems like lots of people stop at lap quilts with these things- they do take a lot of time- but there's nothing like a big, heavy blanket to wrap up completely in. It looks so soft...


Something you really don't see a lot of is nice crocheted jewelry. This Old World Crown necklace by irregularexpressions is one of many intricately crafted pieces. This one sort of has an exotic feel, like it came from a marketplace somewhere far, far away.
New ideas for an old craft. Or maybe I should say a timeless craft. That's better. Let's thank our grandmothers for teaching us and go teach a new generation!

Thursday, August 6, 2009

10 Solid Reasons

4 solid reasons to buy handmade:

1~ Individuality. Go into any chain clothing store and what do you see? Rows and rows of same-ness. Boring! Be different. Most handmade things are one-of-a-kind, baby! So are you. So dress like it! Now understand: when I say handmade, I mean handcrafted, with love and creativity. Not just something put together in a factory, albeit with someone's hands.

2~ Sweatshops. We all know they're bad. We all know those people work under horrible conditions, making pennies a day. Of course the argument could be that they need that money to feed themselves and their families, that's true enough and I bet most of them are glad to have their jobs. But plenty of people here in the USA are also slaving away, making wonderful handmade goods for you and just trying to survive! See, here's my sweatshop:

Dark, cramped, dirty...
(Don't get me wrong though, sweatshops aren't funny)

3~ Keep those old traditions alive- crochet, knitting, sewing, painting, woodworking, soapmaking, baking, tatting, weaving, ceramics, sculpture, and more- when you buy handmade, you keep those handicrafts alive. Usually those items are made with lots of love and creative expression. Who wants a world created by robots?

4~ Natural. Many handmade items aren't made with tons of chemicals, dyes, and nasty fake stuff. You don't have to get all hippie and organic, but have you looked at the ingredients of some of the store-bought stuff we put on and in our bodies? But take handmade products- like soap, for example- most of the ones I found had only a few ingredients, and I could pronounce and identify each one! :)


The textile manufacturing process is a giant ball of negative environmental impacts. But we have to have clothes. And it's nice to have cute ones at that. And I looooove fabric. But there's just so much fabric and clothing already out there, that if we could just reuse what we've got without making more we could reduce some of the waste. There's so much waste. So with that, I give you...

6 solid reasons to buy recycled, upcycled and reconstructed clothing:

1~ Cotton is one of the most water and pesticide dependent crops. According to reactions, cotton "occupies only 3% of the world’s farmland yet demands fully 25% of the world’s chemical pesticides and fertilizers." By reusing and recycling things made of cotton we can decrease chemical usage that would otherwise be applied to the growth of new cotton.

2~ Sizing.
Sizing is a binding agent (glue) applied to fibers before weaving in order to reduce breakage and dust production during the weaving process. Usually the sizing is a starch or a synthetic polyacrylic compound. This makes the fabric stiff and needs to be removed before it's dyed or made into clothing. Scouring and/or solvents are used to remove the size, and generally the waste product is disposed of in water, increasing the chances of water pollution.
(Environmental Impact of Textiles by Keith Slater)

3~ Dust. It gets in the air, it gets in your lungs, it's gotta go somewhere...

( Waste Couture: Environmental Impact of the Clothing Industry by Luz Claudio)


4~ Synthetic fabrics. Polyester is made from petroleum and the production process is "energy intensive and results in significant emissions, including large amounts of a potent climate change gas – carbon dioxide" (cazco interiors ltd). Nylon, a similar polyamide (synthetic fiber) can take 30-40 years to decompose. Reuse that stuff as much as you can! Stop making more, it never goes away!

5~ Landfills. They're pretty full already...


6~ Sheep Dip. "The term sheep dip refers to a liquid formulation of insecticide and fungicide which shepherds and farmers may use to protect their sheep from infestation against external parasites such as itch mite (Psorobia ovis), blow fly, ticks, keds and lice" (Wikipedia). Not only do the sheep have to be dunked into this stuff, but it's also dangerous for the farmers, and those chemicals have to be disposed of somehow. That poor sheep already has been dunked once, why not reuse that wool and save him a chemical bath?

There you have it. 10 solid reasons. What are your thoughts?

Tuesday, August 4, 2009

This is What Inspires Me ~or~ Fabric That I Love!!!

A lot of my work is nature-themed and inspired by the outdoors. But more often than not, I find my creativity kindled by the fabric itself. One of my favorite things to do is browse through thrift store fabric piles and see what goodies I can dig up. I go crazy over old lady pillowcases, psychedelic tablecloths, vintage curtains, and funky yardage. The more retro the better! I can't wait to bring home my finds and make a cool bag after I've been out shopping.

Today I decided to feature some of my favorite fabrics that I've got on hand. Here's my ode to the retro, the funky, and the vintage, the unusual, and the orange (I've really been feeling the orange lately):

I got this sweet acorn fabric from a friend who got it from an older lady. I haven't used it in any projects yet, I am just waiting for the perfect complimentary fabric to match it.
I used this brocade to make a needle case for my crochet and knitting needles. It's really heavy and solid and feels so good in my hands! (aaaand it's rainbow-colored!)I think this fabric is beautiful. But it's a stretchy polyester and I find it really hard to work with. Not my favorite weave. Too slippery to sew. But I couldn't resist buying it any way when I found it at the thrift store! I think it will eventually become a nice dress or skirt when I get the guts to tackle it.

This stuff was really cool- two small curtains in some type of linen-like fabric. It's already all gone, but it lingers in my memory...I made a little shift dress from this gray knit:

This velvety feather fabric came from a garage sale. It feels so good and it's so unusual! I paired it with a deep burgundy fabric for one bag and it turned out beautiful!
This paisley canvas has been a lot of fun. Here's a cool old pillowcase!Psychedelic paisley is my favorite......My absolute favorite.
And trippy rainbows come in a close second!Those are my goodies!! ...writing that post made me want to go hit up some thrift stores...

Sunday, August 2, 2009

Canyon Night River Messenger Bag

I really love this bag. This one I almost want to keep for myself! I think I put about 4-5 hours of work into this, and lots of love. It turned out pretty big and I almost considered making it a wall hanging, but decided that the world needs big handbags just as much as it needs little teeny ones. The Canyon Night River bag... see the little rapid at the bottom?

Friday, July 31, 2009

All Things River

So, sewing is my moonlight job. My 'real' job is working as a river guide on the beautiful and powerful Colorado River that flows right through the middle of Grand Canyon! It's wonderful, and whenever I am down there I feel so privileged to get to be one of the few that have the opportunity get to know that wild place so intimately.

In honor of rivers, great and small, Colorado or otherwise, I have put together a collection of river-themed items. All of the items featured here have something to do with a river or have a river feel to them. Either way, they appealed to me, and I thought they deserved to be shared!

This Pebble Ring from Lymric really is awesome! I love the rough and natural appearance, yet it still looks delicate on your hand. And the bezel surrounding the river stone is truly unique. Gorgeous.


Majkatree's Grass River Market Tote makes me feel like I am sitting right on the bank of a cool river, looking through the grass while dipping my toes in the water. Is there a better place to be? And what better way to add a little individuality to your shopping bag?


This looks like something a river nymph would wear! I love applique, of course, and the color of this Misty River Halter Top reminds me of the color of the Colorado River- red and muddy. Beautiful. The asymmetrical hemline of this top also looks really sexy. Beautifulchaos has a lot of items that I would love wearing. I really admire her work.


This Mountain Stream collage really caught my eye. Shellieartist's technique of fabric on wood allows us to appreciate the colors and textures of fabric in a different way other than the clothing and bags that we are used to seeing that media employed in. I love the fanciful settings she creates. I loved browsing through her shop and each little work of art made me smile.


I love rainbows. I love anything that has rainbow colors. I love this necklace! EarthGrrrlCrafts describes this Rainbow River necklace as outstanding, fabulous, and focal. It is. The accents of the larger beads scattered throughout the seed beads helps give it some weight and substance. I think it is classy without being childish, and playful enough to not be too classy. Know what I mean? I even just love looking at it.


Sometimes the simple beauty of the river stones lying along the banks get upstaged by the soaring canyon walls and the rushing river. These Hanging Riverside earrings by RunakoDesigns bring these little stones front and center. Their natural, simple beauty let you appreciate the little things. I bet their cool, delicate weight feels great brushing against your cheek.


Here's another great landscape: this Purple Mountains Majesty Mosaic Belt Buckle from Peicesofmemosaic. This little river runs under a sunset. See the little bird up there in the corner? I bet he's happy to be soaring over such a peaceful setting. I would be :)


A big hand to all the above artists!! Wonderful work. Thanks for bringing a little bit of the river to our everyday lives!

River Bag Line

I've decided to start a new theme-focused bag line: Rivers! These bags will feature collage-type appliques using lots of textured and patterned fabrics to form rich pictures, with a river running through each one. Here's some pictures of my first one, the Mountain River Messenger Bag:

Check back for pictures of more bags! I will also be featuring another product review of river-themed items. Coming soon!

Friday, July 24, 2009

Wallet Tutorial

In this tutorial, you will learn how to make a cute, thin little wallet with 4 pockets for cards and licenses, a large pocket for bills, and a velcro flap that keeps it closed. These wallets are quick and easy and usually take me less than an hour.

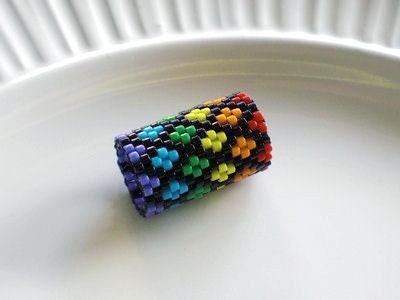
Here are some pictures of the finished product!

You will need:

*Several pieces of lightweight fabric. Unless you have a heavy duty sewing machine, I wouldn't use anything heavier than quilting cotton. I have tried making these with corduroy, linen, wool, etc, and all it gets me is frustrated with about 6 broken sewing machine needles! Also, 2 to 3 different complimentary/contrasting colors and patterns of fabric work best. You can make the wallet with one color fabric, but I think three different ones looks best.

*Ruler

*Scissors

*Pins
*Sewing machine (with a heavy duty needle, preferably)

*Iron and ironing board

*One large button or several smaller buttons (optional)

*Thread

*Velcro- I use the 3/4” strips of velcro and cut them to about 1.5” in length.

*A credit card for measuring and double checking your pocket sizes

*Something long and pointy for pushing out the corners of you seams. A crochet needle or a chopstick works great for this. A pencil or pen is not so great as it will poke through your fabric leaving a hole :(

Step 1: Cut out your pieces:

* 4 pieces 3” x 5” for the credit card pockets.

*2 pieces 3” X 5” for the velcro flap.

*2 pieces 5.5” x 8” for the outside of the wallet and the inner lining of the bill pocket.

*2 pieces 5” x 8” for the inside of the wallet and the inner lining of the bill pocket.

(By the way, you can click on any of the pictures and get a zoomed in version)

Step 2: The credit card pockets. Take the 4 credit card pocket pieces and lay them right side down. Iron the top edge down 1/2”. Then fold over 1/2” again and iron once more. This should hide the top raw edge of the fabric and your piece should end up being 2" tall. Do this to all 4 pockets.

Sew across the top edge of the pockets. ALL SEAMS SHOULD BE 3/8 OF AN INCH unless otherwise specified.

Many of your stitches are going to be on the outsides of the wallet, and therefore, visible. You can have a matching color of thread, or a nice contrasting color usually looks good, as long as your stitches are fairly straight :)

2 of the pockets will be partly hidden under the 2 pockets on the outside edges of the wallet. Take these two inside pockets and zig zag the bottom edge:

Step 3: Take one of the 5” x 8” pieces and fold it in half. Iron the fold. This marks the middle of the piece. Take the two card pockets that you just zig zagged and lay them 3/4” from the middle of the piece. Pin them down. Then sew just along the top edge of the zig zag stitches to secure the bottom. This keeps your cards from sliding down.

Then take the other two pockets (the non zig zagged ones) and line their raw edges up with the sides of the larger piece. Pin them down. Then sew (LESS THAN 3/8" of an inch from the edge of the fabric) along the sides of the pockets. This just tacks them down to hold them in place. This is not the final seam.

"

Step 4: Finish the inside. Take the other 5” x 8” piece and lay it on top of the other pocket piece you just finished. Both right sides should be together. Sew the top edge.

Flip that piece over so that both wrong sides are now together and iron the seam flat. Sew that same top edge again, but this time your stitches will be visible. If you'd like, you can sew once more along the top edge, but between the edge and your last stitches.

Step 5: The velcro flap. Take the two 3” x 5” pieces you cut for the flap and place them right sides together. Sew along 3 edges, leaving one of the smaller edges open. Cut the two corners along the sewn seams.

Turn inside out and iron. Sew once more along the same 3 edges but this time on the right sides of the fabric so the stitches will be visible.

Take your velcro piece (the side with the stiff plastic barbs) and place on the side you want facing down on the finished wallet. Place the velcro 3/8 to 1/2” from the edge of the flap. Sew around all 4 edges of the velcro.

Step 6: Put it all together! Ok, listen carefully! We're going to make a wallet sandwich. Take one of the 5.5” x 8” pieces (the biggest ones that we have done nothing with so far) and lay it right side up. This piece will be the lining for the bill pocket and will be mostly hidden. (I usually sew my GypsyTree tag on this piece as you can see in the picture)

Take the pieces with the credit card pockets and put these on top of the other piece with the pockets facing you. Make sure that the bottom of this piece lines up with the bottom of the other piece. The bigger piece should have about 1” of fabric sticking up above the pocket piece.

Now take the velcro flap piece and line it up with the edge of the other pieces (Heres something cool- for right handed people, put it on the left edge, for left handed people, put it on the right edge, you'll see how it works when it's done). Make sure you lay it more or less in the middle and VELCRO SIDE DOWN!!! That is very important.

Lastly, take the final 5.5” x 8” piece that will be the outside of the wallet and lay it right side down on top of everything else, completing the sandwich. Pin it together, taking care to make sure everything stays lined up and flat.

Step 7: Sew it all together. Start at the bottom edge, about 3” from the middle and start sewing around all edges. Stop when you get back to the bottom edge, about 2” from where you started. This will be the hole where you turn everything right side out. The larger the hole you leave, the easier you will be able to turn the wallet right side out, however, it will be harder to hide the opening once the wallet is finished. I find that about 2” leaves enough room to turn it right side out but will still be easy to close and hide the hole.

Cut all 4 corners off at an angle.

*Carefully* turn the wallet right side out, and don't stretch the fabric or rip your seams. Slow and steady.

Take your crochet hook or chopstick or whatever you have, put in the hole, and poke out the corners of the wallet. Don't poke a hole in your fabric! Also, the bottom corners where the fabric is real thick probably won't get very square. Don't worry too much about that. Iron the edges flat, paying special attention to the hole- make sure the edges are folded under even so that the hole is not obvious.

Take a credit card and put it in one of it's pockets. Slide it up as far as it will go to the top stitch. Make sure that along the bottom edge, there is enough space to sew a 3/8” seam and that the card will still fit in the pockets. If there is, sew along the bottom edge with a normal 3/8" seam. If there is not 3/8” space, then just sew your stitch far enough away to make sure that cards can fit in all 4 pockets. Then sew once again between the edge and your first stitches. This will close up the hole and add a finished look to the wallet.


Then sew along the top edge of the wallet. You can sew this twice like the bottom edge if you'd like.

Step 8: The other velcro. Fold your wallet in half. Bring the flap across the wallet and find out where the second half of the velcro needs to be. Pin it in place. Now this part is tricky. You will have to sew around the velcro, through the two pieces of fabric that form the outer side of the bill pocket. With some machines this can be hard, because it's a tight little place, but it can be done. If you get frustrated, you can sew it on by hand.

Your stitches will be seen on the inside of the bill pocket, but this is usually hidden and doesn't matter. (oops- I sewed through my tag!)

Step 9: Last step! I usually like to take either one large button or several small ones and sew them on the flap on the other side of the velcro. I think it adds a really cute touch and finishes off the wallet.

Now you're all done! These wallets are great because they are nice and thin and you can put them in your back pocket without feeling too bulky.

If you have any questions about this tutorial, or if you notice any mistakes, please email me at rachel@gypsytree.com and I will get back to you!!

You can view some of my other finished wallets here: www.gypsytree.com